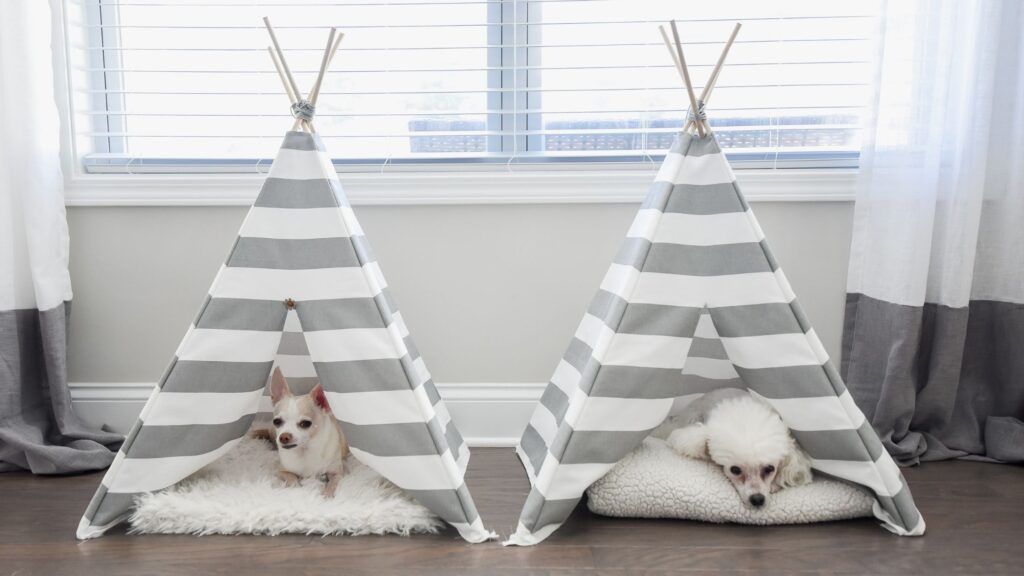
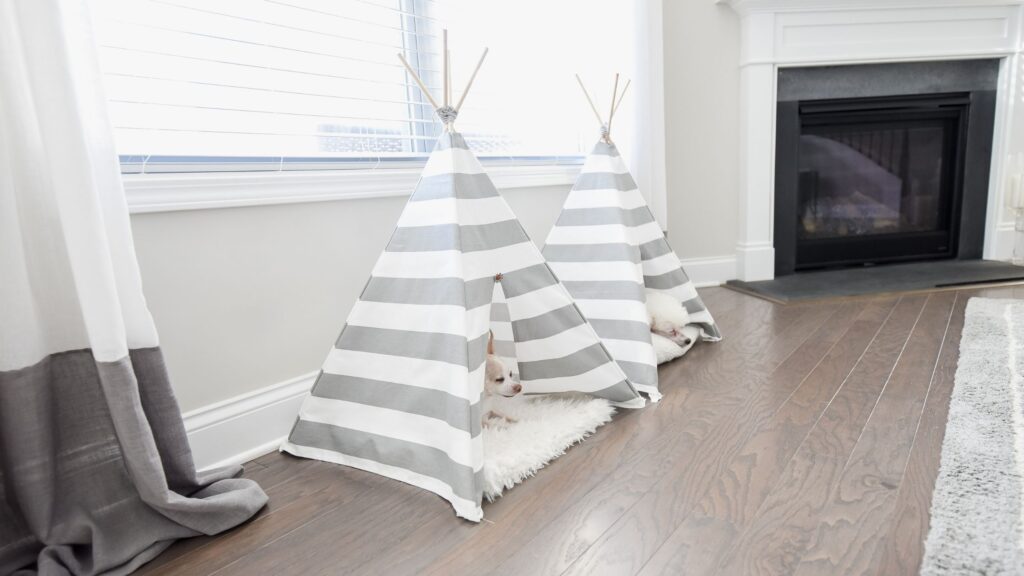
Have you ever seen those cute dog beds that look like little teepees? I’ve had my eye on them for quite some time! My two small dogs love to burrow under blankets and hang out in confined spaces. It makes them feel safe and secure. So, I only imagined how much use they would get out of little teepee style beds. Perhaps your dogs are the same way!
While these tent beds are available at various online retailers, the higher quality options can get pretty pricy. Plus, it’s fun to DIY things. So, I set out on a mission to create my own. I looked into store-bought styles and features. I also watched several DIY tutorials. Ultimately, I wound up creating my own pattern.
For a complete step-by-step visual, watch the video at the top of this blog post (as you scroll, it should also stick to the bottom or side of your screen)! You can also see it on YouTube HERE.

What You’ll Need
- 2 yards of canvas fabric*
- Pencil or chalk, to mark the fabric
- Fabric scissors
- Long ruler or measuring tape
- Pins or fabric clips
- Sewing machine
- Thread (that matches your fabric)
- Four 3/8″ x 36″ wooden dowels
- Strong crafting rope or twine
*I saved money on my canvas fabric by getting it at Hobby Lobby. If you download their app, you’ll get a 40% off coupon, which you can use on one full-price item each day.
*While I recommend getting a heavy and durable canvas fabric at your local craft store, this DIY dog bed will also work with an old bedsheet! I’ve tried it and it still comes out cute.

Directions
Step 1: Cut four fabric triangles, which will ultimately become your teepee’s side panels.
- Open your fabric, right side down. At the bottom of one corner, measure and mark 26″ long.
- At the halfway point (AKA the 13″ mark), use your ruler to measure 31″ up. This is the top of your triangle.
- Use a pencil to connect the points, creating a clear triangle. Use your scissors to cut along the line.
- Repeat three more times, until you’re left with four triangles.
Tip: To maximize your fabric, alternate triangle directions.

Step 2: Make space for the wooden dowels to stick out the top.
- Stack all four fabric triangles on top of one another.
- With your ruler, measure and mark 4″ down from the top.
- Cut the triangle’s top.

Step 3: Stitch the fabric to prevent fraying.
- Fold the top and bottom edge of each triangle about 1/4″.
- Use your sewing machine to stitch down.
Step 4: Make a door/entrance.
- On one of your triangles, measure and mark 15″ up the center. Use your scissors to cut along that line.
- Fold both sides of the opening back, about 1/4″, and use your sewing machine to stitch down. Once again, this is to prevent the fabric from fraying.

Step 5: Sew the triangles together and create pockets for the wooden dowels.
- Line up the edges of your first two triangles with the right sides facing each other. Use pins or fabric clips to secure.
- With your sewing machine, run a stitch right next to the edge.
- Next, use your ruler to measure and pencil to mark a parallel line, 3/4 of an inch over from the line you just stitched. We’re creating a little pocket where a wooden dowel will sit.
- Use your sewing machine to stitch along this second line.
- Repeat this step with your remaining triangles. You’ll end up with a loose pyramid.

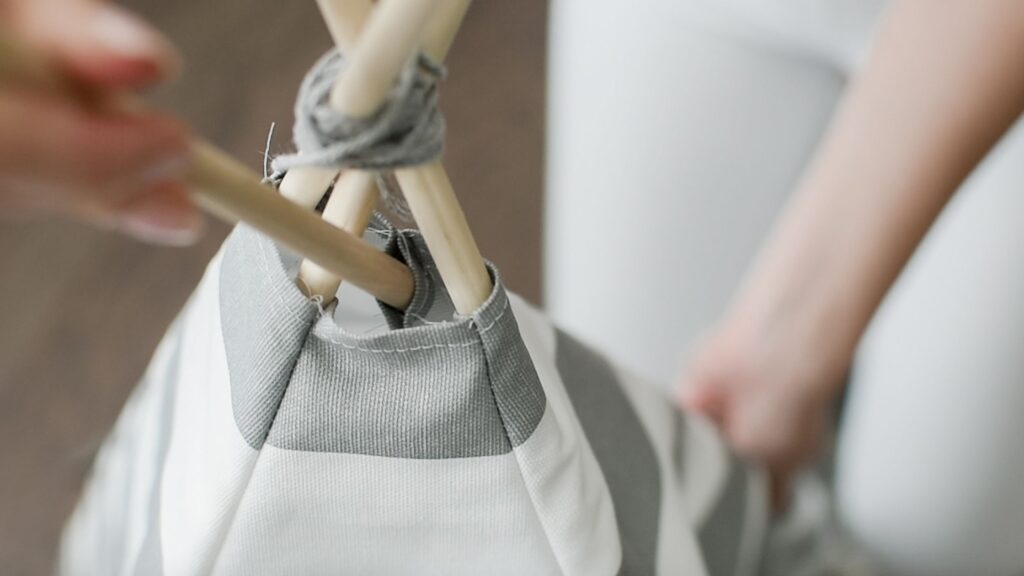
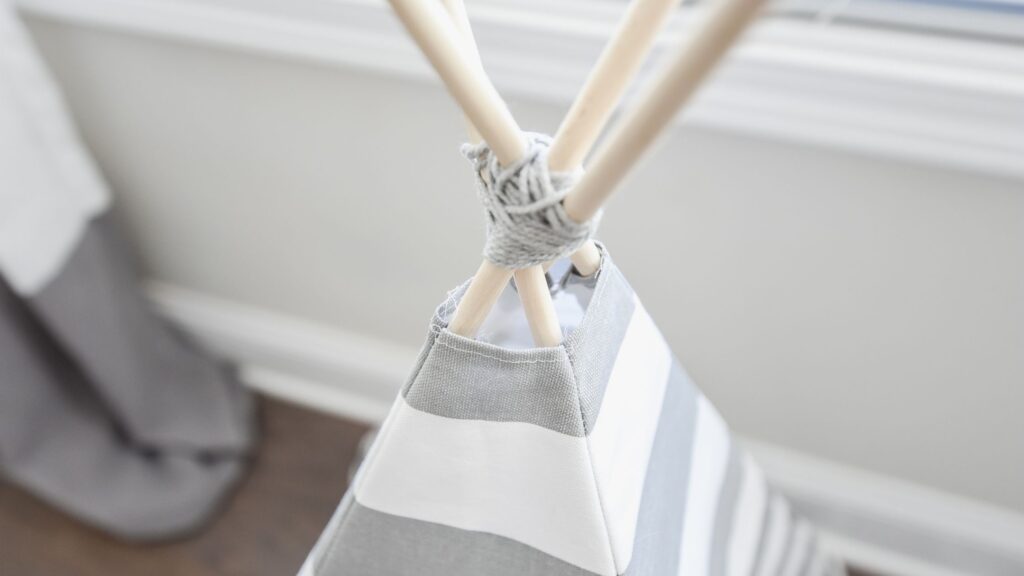
Step 6: Insert the wooden dowels to form your teepee.
- Start by feeding two dowels into opposite pockets. The dowel tops should criss-cross.
- Use rope or twine to secure the dowels in place. Where the dowels intersect, I first like to tie a knot. Then, I continue wrapping about 7 or 8 times horizontally. Make sure you’re pulling tightly. Next, I wrap the rope in the middle of the two poles, vertically, about 3 times.
- Let the remaining rope dangle for a moment while you insert the third dowel. Feed the third dowel under the first two. Then, continue wrapping the rope — both horizontally and vertically — to secure.
- Let the remaining rope dangle for a moment while you insert the fourth dowel. Again, feed the fourth dowel underneath and secure with rope.
Step 7: Make it cozy!
- Place a thin pillow into the teepee along with a couple of toys to make it an inviting space!
Have You Made This Teepee Dog Bed?
If you’ve made this DIY teepee dog bed, I would love to see your creation and feature you! Tag me on Instagram (@prouddogmomblog).