Now that my dogs are a bit older, they love taking afternoon snoozes. (Which explains why I seem to be collecting dog beds and scattering them around my home.) I recently shared a DIY tutorial for a fun teepee-style dog bed. If you haven’t seen it yet, check it out HERE. Those are a must-make for small dogs! Today, I’m back with another DIY dog bed tutorial. This time, it doesn’t require any sewing!
DIY No-Sew Dog Bed
If you scroll through Pinterest or YouTube, you’ll likely find this same DIY project. I’ve made a few adjustments that – while slight – make a big difference.
For a complete step-by-step visual, watch the video at the top of this blog post (as you scroll, it should also stick to the bottom or side of your screen)! You can also see it on YouTube HERE.
Dog Bed Sizing Guide
- X-Small – 17″L x 15″W
- Small – 24″L x 18″W
- Medium – 30″L x 21″W
- Large – 36″L x 23″W
- X-Large – 42″L x 28″W
- XX-Large – 48″L x 30″W

What You’ll Need
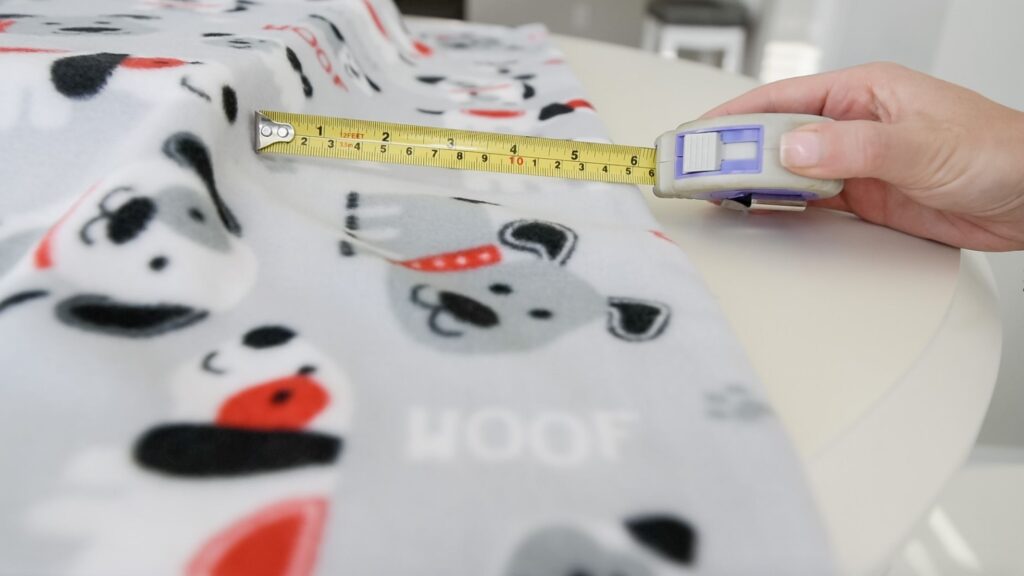
- 2 Pieces of Fleece Fabric (To figure out the exact amount, first, choose a bed size. While it doesn’t have to be exact, you can use the chart above as a guide. Then, for your fabric, add an additional 12″ both horizontally and vertically.)
- Something soft for the center* (Some good options include a solid piece of poly foam, memory foam, or even an old pillow.)
- Fabric Scissors
- Measuring Tape/Ruler
*Many DIY no-sew bed tutorials recommend using polyfill, which is the loose material found in many stuffed animals. However, I would recommend sticking with a solid center, as there are small openings along the edges of this bed. We don’t want our pups scratching out the loose polyfill and eating it — that can be a choking hazard.


Directions
- Open one piece of fabric and place it right side down on a large table or the floor.
- Place poly foam, memory foam, or pillow in the middle of your fabric.
- Cover with your second piece of fleece.
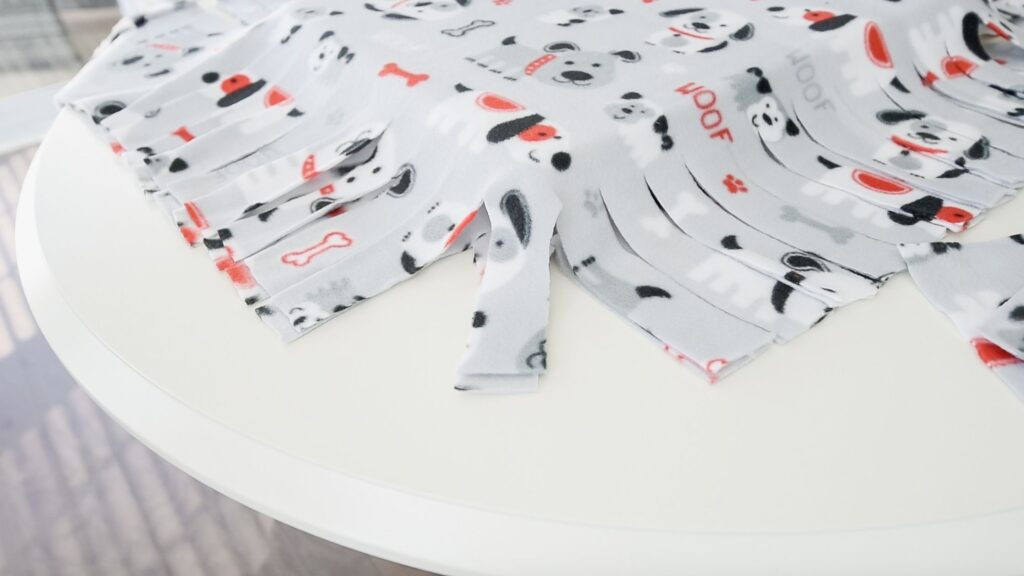
- Grab your measuring tape or ruler and cut down to size, if needed. Ideally, you want to leave 6″ of fabric on all sides.
- Cut excess fabric into strips (about 1″ – 1 1/2″ thick). Cut around all four edges, leaving the corners intact.
- Once your edges are all trimmed into fringe-like pieces, it’s time to go back to the corners. While many DIY no-sew tutorials recommend cutting off the corners completely, I don’t like the gap it creates. So, instead, I recommend trimming off both sides to create a corner strip. Refer to the video above or photos below for a better visual!


- Double knot all of the strips.
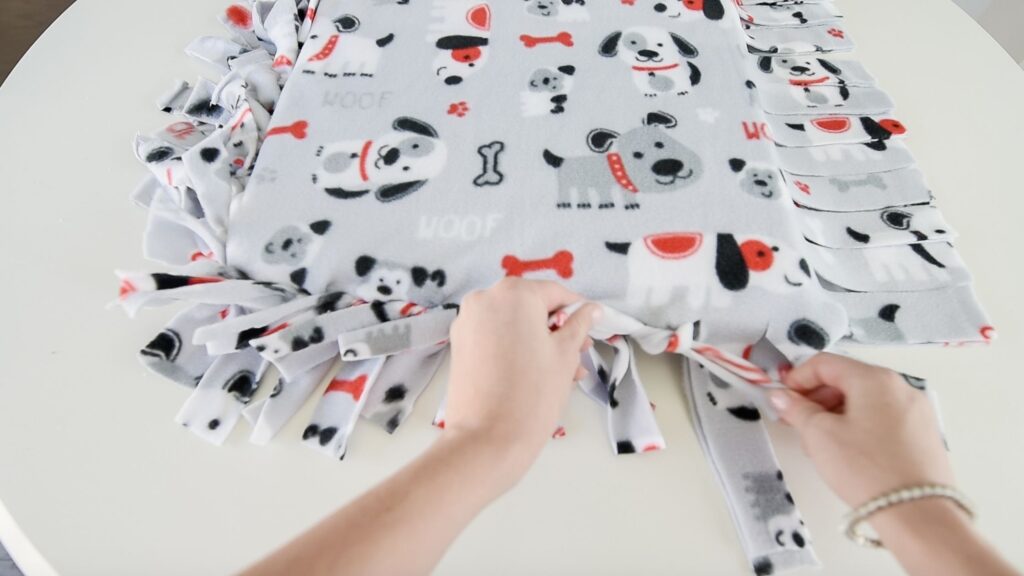
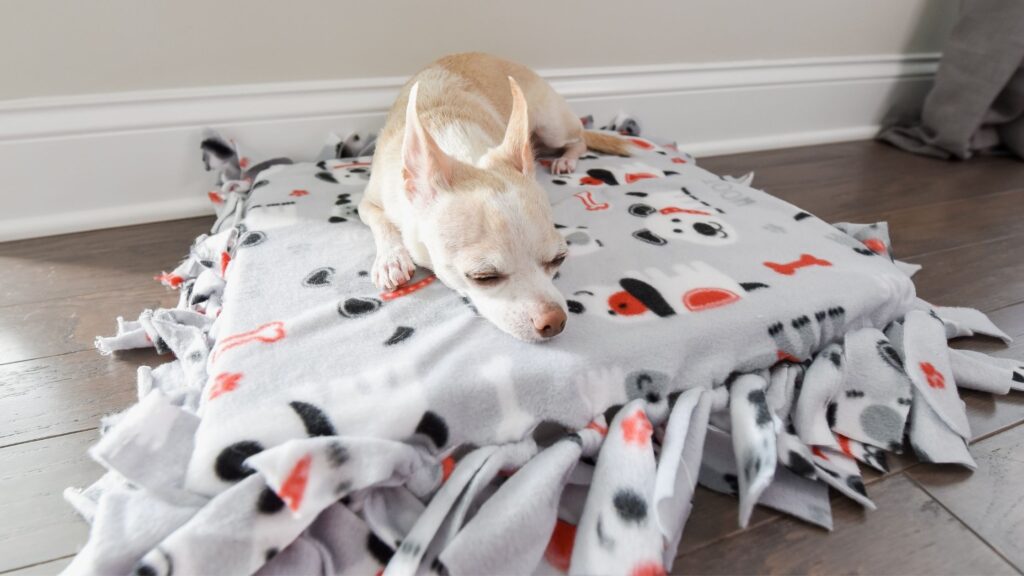
- Voila – you have a dog bed!
Have You Made This No-Sew Dog Bed?
If you’ve made this DIY no-sew dog bed, I would love to see your creation and feature you! Tag me on Instagram (@prouddogmomblog).